Six Practical AI Workflows That Actually Work
Autodesk Assistant introduces a new way to interact with Revit, allowing users to query model information and perform supported actions through natural-language prompts.
However, some early users have concluded that Autodesk Assistant “doesn’t work” after receiving an incomplete response or an outcome that was not what they expected.
In many cases, the problem is not necessarily the capability of the tool. It is the way the request has been communicated.
Like any member of a project team, Autodesk Assistant needs a clear brief. A prompt such as “tag the framing” leaves several questions unanswered. Which framing elements? On which levels? In what views? Using which tag type?
A more effective prompt defines the task, scope and required outcome:
“Tag all structural framing elements from Level 1 to Level 23 in plan view.”
The difference is specificity.
To demonstrate what is possible, we have compiled six practical Autodesk Assistant workflows in Revit 2027. These examples show how well-structured prompts can help automate repetitive documentation, interrogate model data and complete large-scale changes more efficiently.
What Is Autodesk Assistant in Revit?
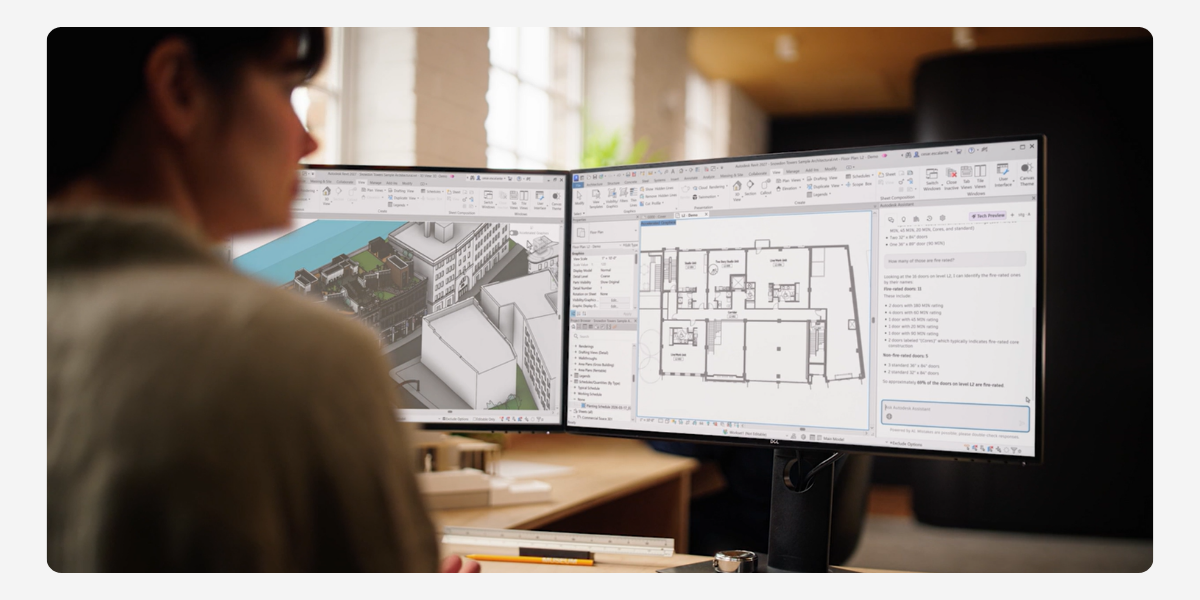
Autodesk Assistant is an AI-powered interface available as a Technology Preview in Revit 2027. It allows users to communicate with Revit using natural language.
Depending on the supported workflow, Autodesk Assistant can:
- Answer questions using official Autodesk information
- Query and summarise model data
- Create and organise views, schedules and sheets
- Modify supported model information
- Apply tags and graphical overrides
- Assist with repetitive documentation tasks
- Save prompts for reuse on other projects
This is more than a general help chatbot. Autodesk Assistant can use the context of the active Revit model and, for supported tasks, turn a written instruction into an action.
It is important to remember that the functionality remains in Technology Preview. Its current capabilities are defined and will continue to evolve. Any AI-generated model change should therefore be reviewed and validated by an experienced Revit user.
How to Write Better Prompts for Autodesk Assistant
Effective Revit prompts generally contain four elements:
- The action: What do you want Autodesk Assistant to do?
- The object: Which Revit elements should it work with?
- The scope: Which levels, views, sheets or parameter values are included?
- The outcome: How should the completed result appear?
For example:
“Apply tags”
is less useful than:
“Tag all structural framing elements from Level 1 to Level 23 in plan view.”
The second prompt provides an action, an element category, a level range and a view type.
For more complex tasks, it can also be helpful to divide the workflow into stages. Ask Autodesk Assistant to query or summarise the current model first, review the returned information, and then instruct it to make the change.
The following examples demonstrate this approach across common structural and BIM documentation workflows.
Workflow 1: Tag Structural Framing Across 23 Levels
Tagging structural elements across a multi-storey commercial project is necessary, but it can also be highly repetitive.
In this example, the Revit model contains 23 storeys. Manually opening each plan view, identifying the structural framing and applying tags would take considerable time.
Instead, the user gives Autodesk Assistant a clearly defined instruction:
“Can you tag all the structural framing items from Level 1 to Level 23 in plan view?”
The prompt tells Autodesk Assistant:
- What action to perform: apply tags
- Which elements to target: structural framing
- Which levels to include: Level 1 through Level 23
- Where the tags should be placed: plan views
Autodesk Assistant can then process the request and apply tags to the relevant structural framing elements across the specified levels.
This type of workflow is particularly valuable on large projects where a seemingly simple documentation task must be repeated across dozens of views.
Workflow 2: Adjust Level Elevations Across a Multi-Storey Building
Changes to floor-to-floor heights can have significant consequences in a multi-storey model.
In this project, a 23-storey building was subject to an aviation height restriction. Following consultation with the relevant authority, a maximum safe building height of 100 metres was approved. The client then requested that the floor-to-floor spacing be increased from three metres to four metres.
Updating every level individually would be slow and could introduce inconsistencies.
The user instead prompts Autodesk Assistant:
“Adjust the elevations so that each level from Level 2 to Level 23 has 4,000 millimetres spacing between consecutive levels.”
This prompt establishes:
- The action: adjust level elevations
- The affected range: Level 2 through Level 23
- The required relationship: consecutive levels
- The exact spacing: 4,000 millimetres
Autodesk Assistant processes the instruction and asks the user to confirm the affected levels before completing the change.
The confirmation step is important. It gives the user an opportunity to verify the scope before a significant model-wide adjustment is made.
A change that would otherwise involve repetitive manual editing—or require a separate plugin or custom automation—can be initiated in a few seconds using a well-structured prompt.
Workflow 3: Create and Renumber Multiple Revit Sheets
Large projects can require dozens or even hundreds of sheets. Creating each sheet and maintaining a consistent numbering sequence is an administrative task that can consume valuable project time.
In this example, the user needs to generate 50 new sheets using the default title block:
“Create 50 sheets, numbering starting with S01, using the default title block.”
This prompt specifies:
- The number of sheets required
- The starting sheet number
- The required title block
Autodesk Assistant creates the sheets in the requested sequence and can provide a summary table of the results.
The table becomes particularly helpful when the sheet structure changes. For example, the first nine sheets may need to become architectural sheets while the remaining sheets retain a structural sequence.
The user can provide a second instruction:
“Replace sheet numbers S01 to S09 with a new sequence starting from A101, and renumber the remaining sheets starting from S101.”
Autodesk Assistant can then update the sheet numbers in accordance with the revised structure.
This provides a much faster way to respond when sheets are added, removed or reorganised during a project.
Workflow 4: Standardise Title Blocks Across Project Sheets
In collaborative projects, different team members may create sheets using different title block families or types.
As the project grows, it can become difficult for a BIM or drafting manager to identify which title block has been used on every sheet. Opening and checking sheets individually is inefficient, particularly when the project contains a large documentation set.
Autodesk Assistant can first be asked to create a table listing:
- Sheet number
- Current title block
- Title block family
- Title block type
This information can be copied or exported as a CSV file and reviewed in Excel.
The BIM manager can then update the required family and type information in the spreadsheet. Once the desired title blocks have been assigned, the revised table can be copied back into Autodesk Assistant as part of a new prompt.
Autodesk Assistant applies the changes to the corresponding sheets, creating a consistent title block standard throughout the project.
This workflow demonstrates an important prompting technique: Autodesk Assistant does not always need to complete an entire process through one command.
A more controlled workflow can be:
- Query the existing model information.
- Export or review the information.
- Define the required changes.
- Ask Autodesk Assistant to apply the approved data.
- Validate the completed result.
This staged approach gives BIM managers greater oversight while still removing much of the repetitive manual work.
Workflow 5: Mark and Tag Piles and Pile Caps
Foundation tagging is a common structural documentation task. Each pile and pile cap must be marked consistently, tagged correctly and represented accurately in the project schedules.
Rather than manually assigning marks and placing individual tags, Autodesk Assistant can be instructed to:
- Assign mark values to individual pile caps
- Apply the specified pile cap tag type
- Assign unique marks to piles
- Place the corresponding pile tags
Piles are frequently assigned unique numbers regardless of their length or diameter, allowing site teams to identify and track individual elements more easily.
Once the workflow has been tested, the prompts can be saved in the Autodesk Assistant Prompt Library. For example, a team could save:
- A pile cap marking and tagging prompt
- A pile marking and tagging prompt
These prompts can then be reused on other projects, helping teams create a more consistent documentation process.
After applying the first prompt, Autodesk Assistant generates the pile cap marks and tags. Users can make any required graphical adjustments, such as selecting a tag and nudging its position with the keyboard arrow keys. The second prompt can then be run to mark and tag the piles.
The updated pile and pile cap marks are also reflected in the relevant Revit schedules.
This workflow shows that the value of Autodesk Assistant is not limited to completing a single task faster. A tested prompt can become a reusable resource that supports consistency across multiple projects and team members.
Workflow 6: Visually Identify Rebar Longer Than 12 Metres
Autodesk Assistant can also help users interrogate a model without first creating a dedicated schedule.
In this scenario, a BIM modeller receives a structural model from a subcontractor and must review the reinforcement. One requirement is that the longitudinal reinforcement bars must not exceed 12 metres.
If there is not enough time to create and configure a new schedule, Autodesk Assistant can perform a quick visual check using the following prompt:
“Assign a red colour to any rebar longer than 12,000 millimetres, excluding stirrups.”
This instruction defines:
- The target category: rebar
- The parameter being checked: length
- The threshold: greater than 12,000 millimetres
- An exclusion: stirrups
- The visual outcome: apply a red override
Autodesk Assistant queries the reinforcement and highlights the elements that meet the specified criteria. This gives the BIM modeller an immediate visual indication of where further review is required.
The colour can be defined using a standard colour name or an RGB value.
In the current Revit 2027 version, Autodesk Assistant applies this colour to projection lines using Override Graphics in View by Element. It cannot currently override the surface colour of an element through this workflow.
The reviewed view can then be captured or shared with the subcontractor to communicate which reinforcement elements require attention.
This does not replace detailed engineering validation. It provides a fast visual screening method that helps the modeller locate potential issues and direct the next stage of review.
Why Autodesk Assistant Prompts Sometimes Fail
When Autodesk Assistant produces an unexpected result, it does not automatically mean the tool is incapable of completing the task.
Common prompting problems include:
The instruction is too broad
“Tag the model” does not identify the element categories, levels or views involved.
The scope is missing
“Change the level spacing” does not explain which levels should change or what spacing is required.
The expected result is unclear
“Fix the sheets” does not define the required numbering sequence, title block or sheet range.
Several unrelated actions are combined
A long prompt containing multiple dependencies can be more difficult to interpret. Breaking it into a query, review and action sequence can provide greater control.
Revit terminology is not used
Prompts are generally clearer when they refer to recognised Revit categories, parameters, view types and element names.
The request exceeds the current Technology Preview
Autodesk Assistant continues to develop and does not yet support every Revit action. Users should distinguish between an unclear prompt and a capability that is not currently available.
A Reusable Formula for Revit AI Prompts
A useful starting structure is:
[Action] + [Revit elements] + [scope or conditions] + [required result]
For example:
“Tag all structural framing elements from Level 1 to Level 23 in plan view.”
Or:
“Assign a red projection-line override to rebar longer than 12,000 millimetres in the current view, excluding stirrups.”
For model-changing actions, consider adding:
“Show me the affected elements and ask for confirmation before applying the change.”
This can make the workflow easier to review and reduce the risk of changing the wrong elements.
Autodesk Assistant Supports Expertise, It Does Not Replace It
Autodesk Assistant can remove repetitive steps, accelerate model queries and make supported Revit automation more accessible to people who do not write Dynamo scripts or maintain custom plugins.
However, it does not remove the need for BIM standards, engineering knowledge or quality assurance.
Users remain responsible for:
- Confirming the scope of proposed changes
- Reviewing modified elements
- Checking documentation quality
- Validating engineering information
- Confirming compliance with project and organisational standards
The most effective approach is to treat Autodesk Assistant as a capable project assistant: give it a clear instruction, review what it proposes and verify the completed work.
Frequently Asked Questions
What is Autodesk Assistant in Revit?
Autodesk Assistant is an AI-powered interface available as a Technology Preview in Revit 2027. It can answer product questions, query model information and perform a defined range of supported Revit actions using natural-language prompts.
Can Autodesk Assistant modify a Revit model?
Yes. For supported workflows, Autodesk Assistant can perform actions such as creating sheets, updating sheet numbers, adjusting levels, applying tags and changing supported element or view information. Users should review and validate all changes.
Why isn’t my Autodesk Assistant prompt working?
The instruction may be missing important information such as the Revit element category, level range, view, parameter, condition or desired result. The task may also be outside the capabilities currently supported by the Technology Preview.
How do I write a good Autodesk Assistant prompt?
Clearly state the action, the Revit elements involved, the scope of the task and the required outcome. Use recognised Revit terminology and divide complex workflows into smaller, reviewable stages.
Can Autodesk Assistant tag multiple Revit levels?
For supported workflows, Autodesk Assistant can apply tags across a defined range of levels and views. The prompt should specify the element category, level range and required view type.
Can Autodesk Assistant create and renumber sheets?
Yes. Autodesk Assistant can create multiple sheets using a defined numbering sequence and title block. It can also update existing sheet numbers when provided with a clear current range and replacement sequence.
Can Revit AI prompts be reused?
Prompts can be saved in the Autodesk Assistant Prompt Library and reused for similar workflows. Teams should review saved prompts before applying them to a different model, as project structures, family names and standards may vary.
Does Autodesk Assistant replace Dynamo or Revit plugins?
Not entirely. Autodesk Assistant makes several supported tasks accessible through natural language, but Dynamo, add-ins and custom development may still be required for specialised or highly complex automation.
Put Autodesk Assistant to Work
Autodesk Assistant is still evolving, but these six examples demonstrate that it can already provide meaningful value in practical Revit workflows.
The key is to move beyond vague requests. Clearly identify the required action, element category, project scope and desired result. For more complex changes, query the model first, review the information and then ask Autodesk Assistant to apply the approved action.
With the right prompts and appropriate human review, Autodesk Assistant can help Revit teams spend less time on repetitive model administration and more time on design, coordination and project delivery.
Watch the workflow videos throughout this article to see each example completed inside Revit 2027.
About The Author

We are the leading provider of civil engineering and survey software solutions and services in Australia.