Rachael Murray, one of our application engineers, has put down her top 5 tips for saving time and frustration in design and drafting.
1. Selection Cycling
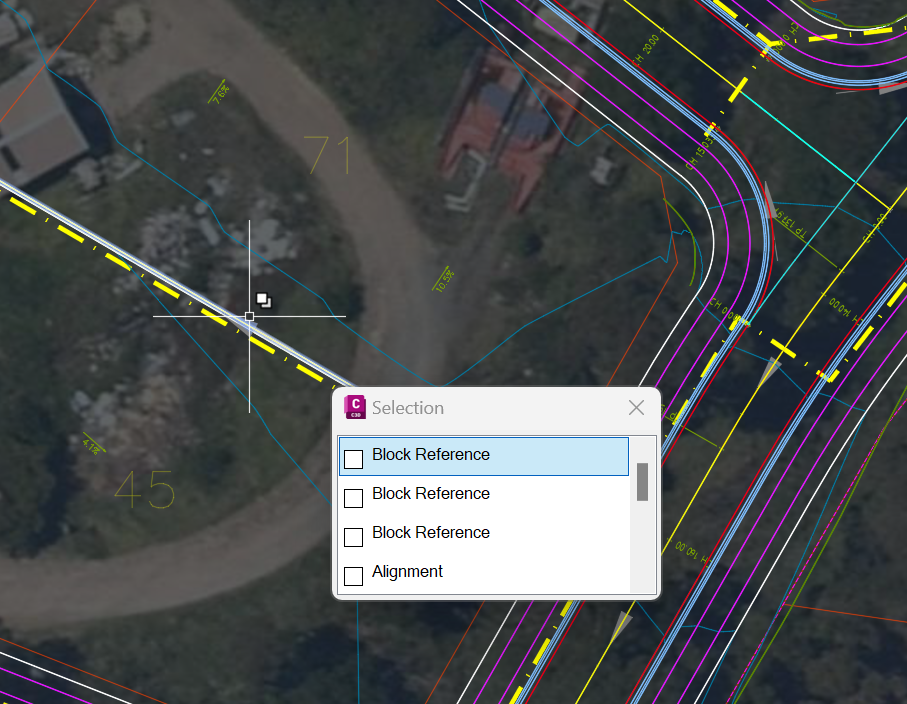
Got a feature line on top of an alignment on top of a polyline and need to select the bottom object? Break out of the endless send to back cycle with selection cycling, or the hidden ctrl+pick technique.
The Selection Cycling tool will bring up a list of objects to select from where you click, if there are multiple objects on top of one another.
You can toggle Selection Cycling on/off from the bottom toolbar. If the Selection Cycling button is not displayed, click on the button with the three horizontal lines (affectionately known as the ‘burger’ button) at the bottom right corner and tick on “Selection Cycling”.
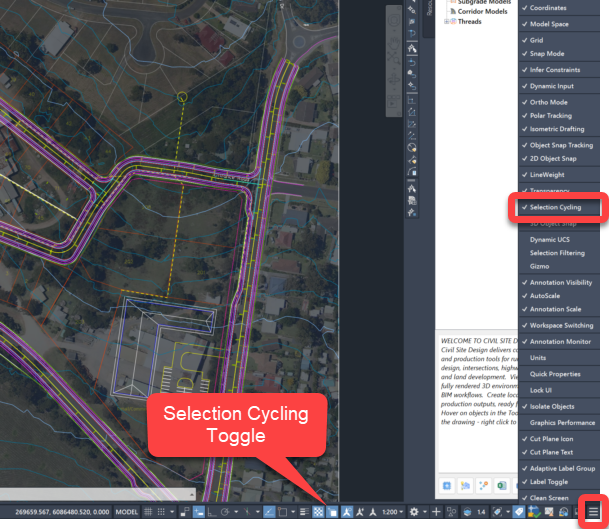
Selection Cycling can also be toggled on and off using ctrl+w.
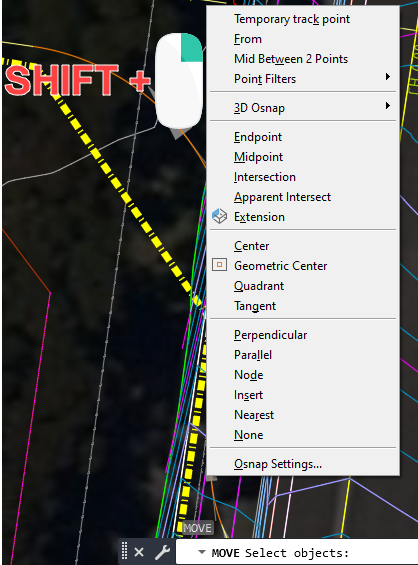
Or you could save time, mid command, by pressing Shift+Right Click. This shortcut allows you to select just one snap from the list to use for the next selection, without changing your Object Snap Settings.
If you’re a keyboard shortcut person, you can also type in the command line when you are offered a pick position in the commandline. Type NEAR to enable nearest snap, PER for perpendicular, INT for intersection, etc. These allow you to toggle a single snap method to use for the next selection, without change to your Object Snap Settings.
2. Snap Overrides
Are you seeing multiple snap points near each other and having trouble selecting the right one? You could open the Object Snap Settings and untick the ones you don’t want, then go back in and tick them all back on again.
Or you could save time, mid command, by pressing Shift+right click. This shortcut allows you to select just one snap from the list to use for the next selection, without changing your Object Snap Settings.
If you’re a keyboard shortcut person, you can also type in the command line when you are offered a pick position in the commandline. Type near to enable nearest snap, per for perpendicular, int for intersection, etc. These allow you to toggle a single snap method to use for the next selection, without change to your Object Snap Settings.
3. OSNAPZ Command
Want to snap to a 3D object but don’t want the associated elevation? Adjust the z (elevation) snap setting by typing OSNAPZ in the command line and changing the value to 1. Now when you snap to a 3D object the elevation will be equal to the x-y plane of your current user coordinate system, which is zero for the World Coordinate System.

4. TEXTLAYER and DIMLAYER Commands
Changing the active layer back and forth between your object and text layers every time you add a note to your plan is annoying! Instead, use the TEXTLAYER command to change the default layer for text objects. Just type TEXTLAYER in the command line then enter the name of the layer you want any new text items to be on. DIMLAYER works the same way for dimensions, saving time and disruption switching layers.

5. ZOOMFACTOR Command
Need to zoom in just a little but one click of the mouse wheel is too close, and you can’t find that sweet spot? The command you need is ZOOMFACTOR. Type this into your command bar then enter an integer between 3 and 100 (100 being the biggest zoom) and press enter to adjust the amount you zoom in and out by.

About The Author

We are the leading provider of civil engineering and survey software solutions and services in Australia.