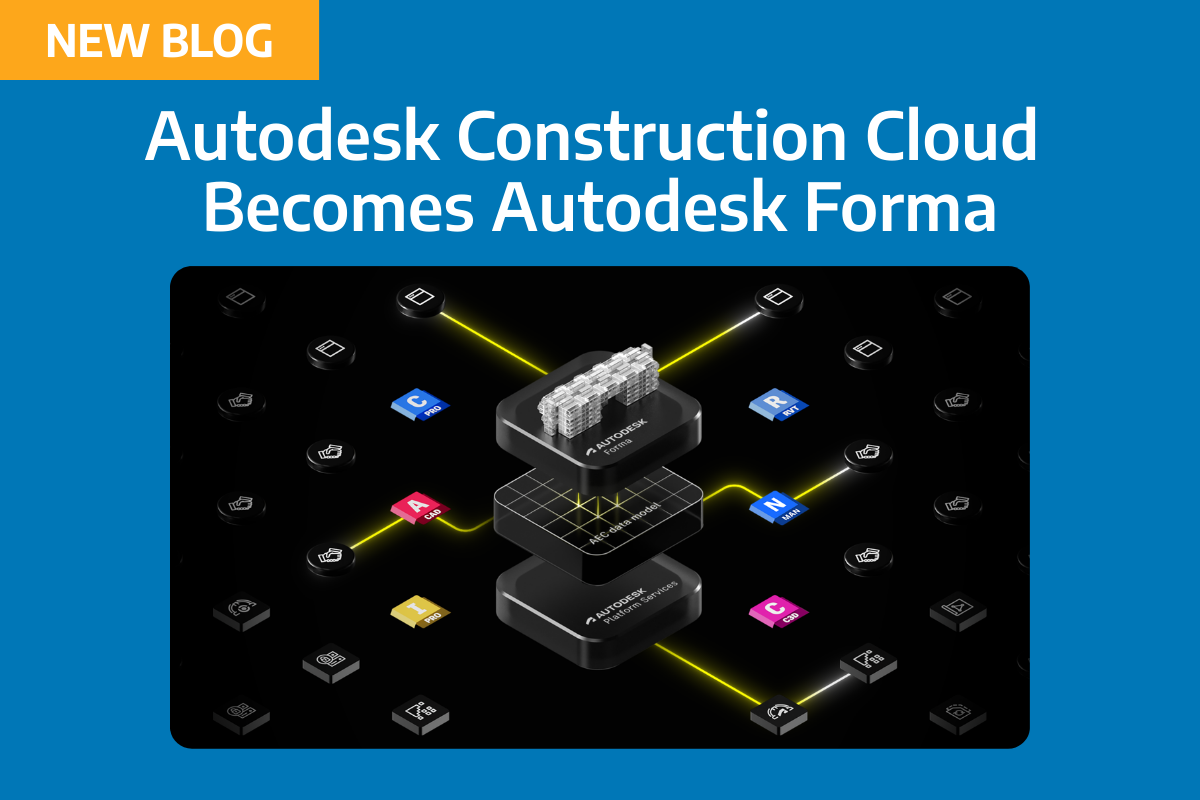
What is Autodesk Forma?
In 2020 Autodesk acquired the Norwegian startup Spacemaker, a generative design and concept building platform. Recently relaunched as Autodesk Forma, the web-based platform is aimed to provide architects, urban designers and planners tools to realise the full potential of the site by enabling them to quickly generate, optimise and iterate on multiple design options, something that has been difficult using traditional CAD or BIM tools.
The great news is that Forma is now part of the Autodesk Architecture, Engineering and Construction Collection (AEC-C).

Autodesk Forma helps planning and design teams deliver projects digitally from day one. Use conceptual design capabilities, predictive analytics, and automations to make solid foundations for your projects by considering design criteria and data like terrain, maps, wind, lighting, traffic and planning restrictions
Importantly, Forma offers the ability to consider sustainability options from the start, using tools that may be familiar (if just in appearance) to the original Autodesk Ecotect. The platform can also utilise the emerging artificial intelligence to automate and accelerate Outcome Based Design with a fresh interface and reporting that is easy to understand. Once you have started a new project with a site location, Forma allows for the user to obtain data for connected services for buildings, roads and terrain with data such as existing building geometry, aerial imaging and mesh, weather, sun and traffic data (location dependent). Current providers include Open Street Map and MapBox, with more being incorporated in the future.
In the current release, Forma links directly to Autodesk Revit via a customised bi-directional connector, as well as supporting importing of .OBJ, .IFC and .DXF (limited to 100MB).
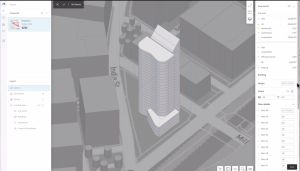
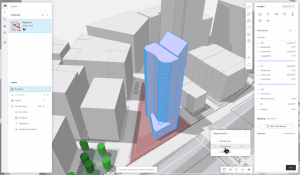
Although currently there is no direct link to surfaces generated from Autodesk Civil 3D, there is a comprehensive workflow which we have detailed below. Autodesk Forma allows for the editing of the proposed building design using its 3D sketch mode, which includes the common push-pull, modification, rotation and creating additional forms. The proposed design can then be analysed for potential floor area calculation, using various methods and regulations, and compared against criteria’s and planning requirements and regulations.
Forma users can expect to see a continuous stream of updates and additional integration across the suite of Autodesk products.
Autodesk Civil3D & Forma workflow for residential areas development
You can use Autodesk Civil 3D to perform parcel division and then export data in DXF format to a Autodesk Forma project.

Autodesk Civil 3D: Parcel Division
The first step is to set up a project in Civil 3D, with contextual data :
- Add land registry parcels (which are often provided in GIS file format) and draw the boundaries of the project.
Note: You can display the Bing Map raster with the « Geomap » command (please check that the coordinates system is correctly set up) :
- Then draw the no-building zone due to local legislation. Here, green spaces have been added to the project where you can’t have buildings.
- Last thing for the preparation is to draw the road allowance. You could use the Civil 3D tools like alignments, but at this stage of the project, using only 2D polylines can be enough.
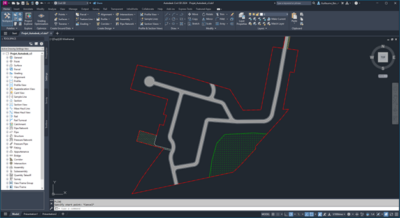
Then parcels creation can start. First thing is to create the main zones with big parcels that will be divided afterwards :
- « Boundary » command to create a closed polyline of each zone
- « Create Design > Parcel > Create Parcel from Objects »
Use « Parcel > Parcel creation tool » to semi automatically create parcels with required constraints. For example, in this project, the area of the parcels had to be between 400 sqm and 500 sqm.
- Fill the parameters
- Select « Slide Line – Create »
- Chose the site, style, labels and every required Civil 3D parameters in the next window
- Click on the parcel label to select the parcel to divide
- Chose the start and end point of frontage
- Specify the angle of the new boundary with the frontage (usually 90°)
- Autodesk Civil 3D then makes a proposal of the best solution following the constraints provided
- Press enter the validate. Autodesk Civil 3D shows the next parcels until the entire area is divided
- Note : it is possible to modify the parcels name that are created automatically if the order is not right.
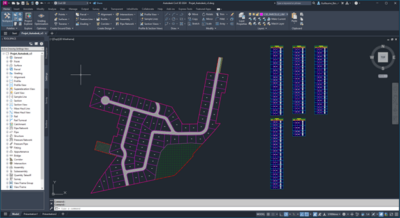
- Final step is to explode the parcels to transform them into polylines, and then save the file to DXF format so that Forma can read it.
Open Autodesk Forma and Connect to Autodesk Forma hub.

- Create a « New project», fill the form and project address
- In « Library », import DXF file (generated from Autodesk Civil 3D software) « Save and close»
- In « Library », Add the DXF file and make some placements adjustments
- Add Autodesk Forma « Road» on top of DXF file

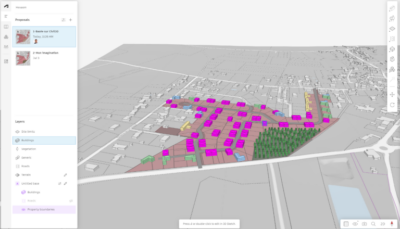
- Use the « 3D Sketch» tool to create a set of residential houses
- Make several actions as :
- Add Floors
- Give functionalities
- Save in library
- Populate the project area
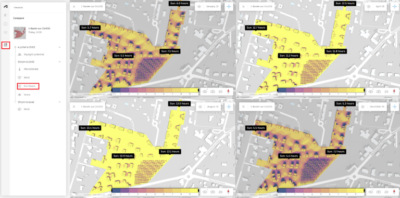
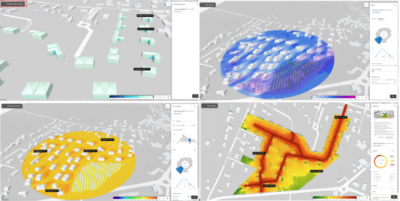
Autodesk Forma : Quality analysis :
- Sun hours analysis
- Daylight, wind (detailed), microclimate, noise (detailed) analysis
How can I access Autodesk Forma?
Autodesk Forma is being rolled out in a stage process across current licence holders of the AEC Collection over the coming months. You will be notified via a email similar to that of your order confirmation email, once your account has been activated. Please keep an eye out for this email as it is easy to miss. You can also check your Autodesk account https://manage.autodesk.com/products to see if it is activated within your account.
If you have any questions, please do not hesitate to contact us at sales@civilsurveysolutions.com.au.
For further information and video content, visit the Forma product page https://www.autodesk.com.au/products/forma/overview
Autodesk also recently conducted a webinar on Forma and it can be accessed on-demand here: https://www.autodesk.com/webinars/revolutionize-site-planning-process-forma
About The Author

Ben our Autodesk Business Manager and a structural engineer, has experience with renowned firms including Opus International, SMEC, and WSP, specialising in bridge design on notable projects such as the Pacific Highway Upgrade. Using his technical expertise, he advises on leveraging Autodesk products to enhance productivity.